
Guide to Mirror Your Realme C53 to Other Android devices | Dr.fone
Guide to Mirror Your Realme C53 to Other Android devices
Part 1. Can I Mirror my Android to Another Android?
Yes, it is possible. Technology has made it possible that one can mirror Android to Android.
The accelerated concentration on the mobile application by developers in the wake of the continuous accelerated mobile penetration has led to several applications being created. Most of them are amazing, and one only imagines the experience when emulated to a PC. Today that is now possible with several ways to run android applications on PC, the system was first used by developers to test their applications, and now everyone can enjoy the extended experience of applications taking full advantage of PC features. Several applications answer your burning question on how to use mobile apps on a PC. Here we look at some of the top-rated ones;
Wondershare Dr.Fone
Mirror your Realme C53 deviceto your computer!
- Play mobile games on the big screen of the PC with MirrorGo.
- Store screenshots taken from the phone to the PC.
- View multiple notifications simultaneously without picking up your phone.
- Use android apps on your PC for a full-screen experience.
3,952,713 people have downloaded it
Part 2. How to Mirror Android Phone to Android Tablet
Innovations in technology have allowed some of the things that were at one point, not thought of. One of the amazing developments recently has been the ability to mirror one smart device to another to another smart device. This has made it possible to mirror android to android. Mirroring android to android is the end of the innovation, the innovation even includes the possibility to mirror TVs by a smartphone or even your laptop and operate it with your phone as a remote. The experience is unlimited and includes sharing and playing your Android smartphone content to your tablet and even exporting content from your smartphone to your tablet. Android to Android mirroring is amazing, and you just might want to try it out. It uses Bluetooth, Wi-Fi, or even mobile hotspots.
While there are many tools for android to android mirroring, this example will use ScreenShare, which uses ScreenShare Technology to allow two android to android mirror through Bluetooth, mobile hotspots, or Wi-Fi. This enables, among other things, a better viewing experience, and one can access the internet on another android device through a cellular network of another device. ScreenShare is a free application, and its features are limited to work with Android phone sharing with Android tablets. It also uses the ScreenShare browser, ScreenShare service, and ScreenShare organizer that help manage Wi-Fi or Bluetooth connection and your data exchange between your two mirrored devices.
Requirements
- • A tablet running Android 2.3+
- • A smartphone running Android 2.3+
Part 3. How to install ScreenShare Applications
Installing the browser on your android devices that you want to mirror.
- • On Google Play Store, search for ScreenShare using your device, then select the ScreenShare (phone) app for your tablet and ScreenShare (tablet) app for your phone.
- • Install the application on both devices that you want to mirror.
After the installation is successful, it then means you can use the ScreenShare connection.
Part 4.Android to android mirroring through Bluetooth
1. Start your installed ScreenShare service on the two devices you want to mirror.
ScreenShare > Menu > ScreenShare service.
2. Set your wireless network to Bluetooth on both devices that you want to mirror (this is if it is set as Wi-Fi), this can be done in the ScreenShare service home screen
3. After setting to Bluetooth, Bluetooth paired devices will be displayed on ScreenShare service.

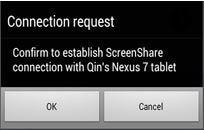
4. If one of the Realme C53 devices that you want to mirror is a tablet, start with it. Find your smartphone name in the Paired Devices list in ScreenShare service. Select your phone name, then tap OK, so that the connection starts. The connection should start from your tablet.
5. The connection should be confirmed by tapping OK on your phone. This is an important step as it establishes a ScreenShare connection.
6. As confirmation of the establishment of the ScreenShare connection, an icon will display on the status bar. Also, a “Connected” status should appear for your other device in the paired Devices list. In the circumstance that you fail to connect the first time, you will be required to wait for at least 10 to 20 seconds, after which you will have to try step 4 and 5.
After the above steps have been done successfully, your devices will have been mirrored successfully, and you can now start to enjoy the experience that comes with it. For connection through Wi-Fi for the two android devices. Take note of the above steps;
•Connect the two devices that you want to mirror to the same Wi-Fi network
•You can also connect your tablet to your phone’s mobile hotspot if you are traveling, on Screen service for both the Realme C53 devices you want to mirror, set wireless network like Wi-Fi, on the tablet service screen, select your phone name to start the connection, then complete the process by confirming on your phone.
While ScreenShare has been used as an example here, there are many other tools you can use to get the same experience. Most of the tools can be downloaded online for free, while others are for a fee. Some of the most popular tools include; Air Playit, Optia, MirrorOp, PeerDeviceNet. Sampling the tools and getting the best that suits the experience you desire is also a good idea, or you can look up the reviews that have been written by other users, and you can pick one or two issues you like or dislike. Most, if not all the tools, have manuals that can even help you get started as they might defer a bit from the ScreenShare example given in this article.

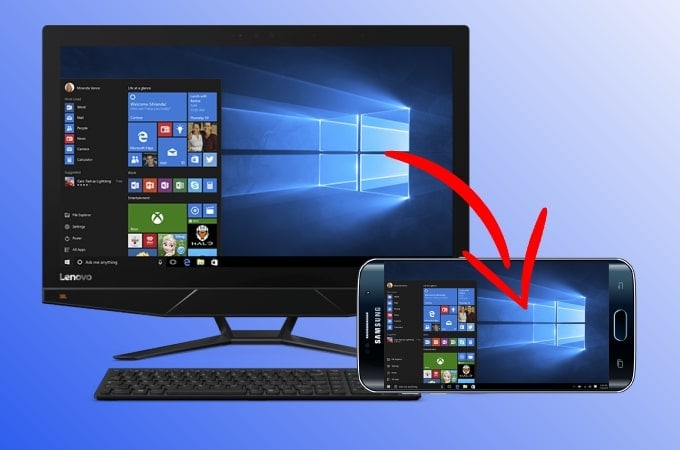
How to Screen Mirroring Realme C53 to PC?
Suppose we consider a situation where you are sitting in a presentation. You discover a major factor that is to be addressed and explained to your colleagues for developing a point, primarily, and have them moved over the point. It would get extremely difficult for you to show your smartphone’s screen to the people sitting there all at once. For avoiding certain disciplinary and time losses, you require the screen to be mirrored to something bigger and wider for everyone to see in the room. This article considers different mechanisms adapted to mirror your Realme C53 and other Android smartphones to PC.
Part 1: Screen Mirroring Realme C53 to PC via Wi-Fi – Dr.Fone Air
There are many screen mirroring facilities you might come across in the market. Considering the functionality being dealt with, efficiency is a major requirement for many users. Wondershare Dr.Fone Air is an online solution providing screen mirroring Realme C53 services to people under a simple operation. If you are looking for a quick solution to mirror your Realme C53 phone to a PC, this tool is a great thing to consider.
You can wirelessly connect your smartphone to the PC’s web browser without paying any price associated with the services. Dr.Fone Air does not disappoint you with the effective Realme C53 screen mirroring that it flexibly executes. To know more about this professional tool for presenting your Realme C53 screen on a PC, you must look into these features:
- This mirroring solution is free to use and has no associated ads attached throughout, which does not hinder your mirroring experience.
- It does not require you to access Bluetooth, NFC, or other services to connect with the computer.
- You can have a flexible phone screen control for adjusting the screen in the best way possible.
Steps to Mirror Your Realme C53 to PC using Dr.Fone Air
We will now look into how to wireless display Realme C53 devices on the computer with this mirroring solution, which will be covered through a Wi-Fi connection:
Step 1: Open Dr.Fone Air on Browser
You must launch any browser on your computer and open the official link of Dr.Fone Air to initiate the process. Ensure that the PC and Realme C53 devices are connected to the same Wi-Fi network.
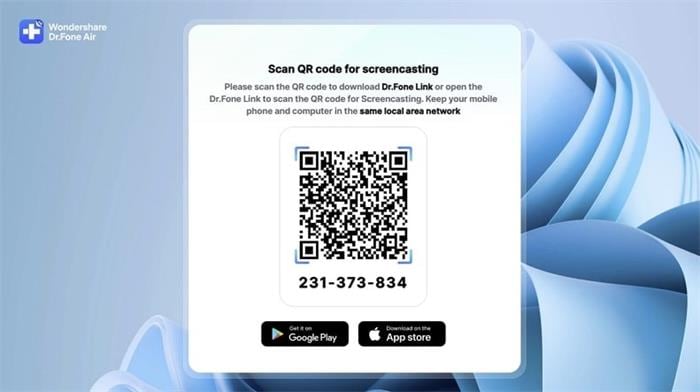
Step 2: Connect Realme C53 through Available Codes
Install the Dr.Fone Link application on your Realme C53 device and scan the QR code displayed on the screen. You can also use the cast code provided below the QR code to connect the Realme C53 devices.
Step 3: Successfully Mirror Realme C53 with PC
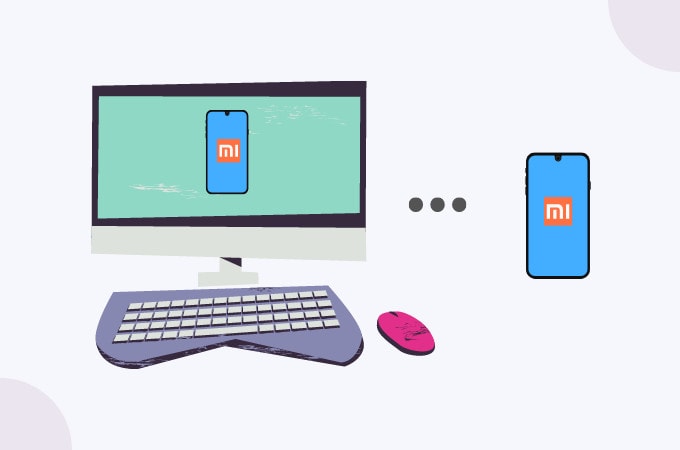
As the Realme C53 devices are connected, Xiaomi’s screen is displayed on the computer, which shows that the mirroring is completed.

Part 2: Screen Mirroring Realme C53 to PC with MirrorGo
There might be many ways that can help you implement screen mirroring over your PC; however, the question comes over the quality of the approach that is being undertaken. While realizing the variety of mechanisms that can be consumed to screencast your Android to PC, there is another approach that offers the most unique and coherent interface to work on. Wondershare Dr.Fone outsmarts the other existing platforms and offers a user experience that enhances the dynamics of screencasting. Following an HD result in the display, MirrorGo officially settles itself as a perfect mechanism for exempting tired eyes while playing over the Android smartphone. Following the mirroring features offered at MirrorGo, it regards itself as a screen recorder and a screen capturer. This leads you to a more expansive utility as compared to other existing mirroring solutions. Another aspect that makes MirrorGo the perfect option is the synchronization feature that allows you to stay put with the data across your Android smartphone. Sharing your Realme C53 to PC is a very simple procedure with MirrorGo, which can be understood from the guide provided as follows.
Wondershare Dr.Fone
Mirror your Realme C53 deviceto your computer!
- Drag and drop files between your computer and phone directly.
- Send and receive messages using your computer`s keyboard, including SMS, WhatsApp, Facebook, etc.
- View multiple notifications simultaneously without picking up your phone.
- Use android apps on your PC for a full-screen experience.
- Record your classic gameplay.
- Screen Capture at crucial points.
- Share secret moves and teach the next-level play.
4,958,941 people have downloaded it
Step 1: Connecting your Computer with the Phone
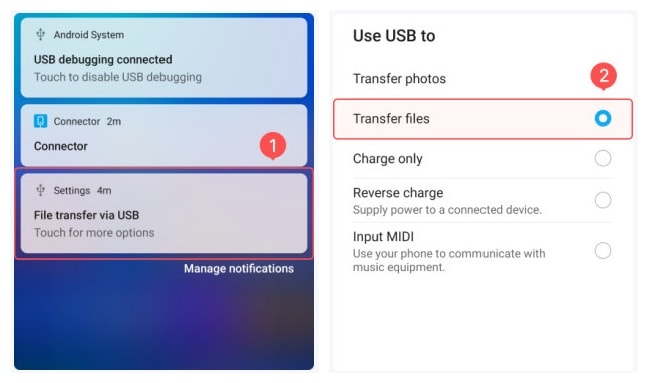
You need to attach your Realme C53 with the PC through a USB Cable. Following the connection, you need to tap on the option of “Transfer Files” provided in the prompt message.
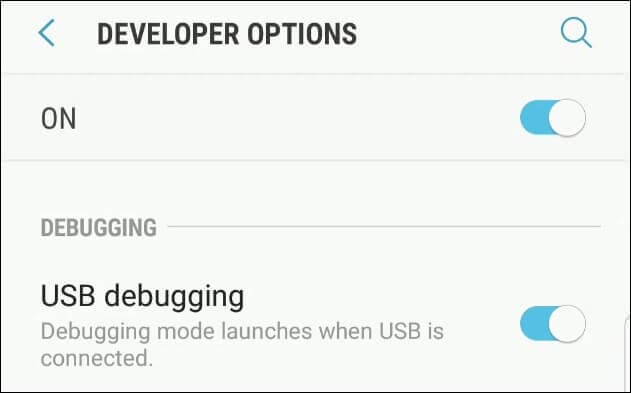
Step 2: USB Debugging
Following a successful establishment of a connection with the computer, you need to access the Settings of your Realme C53 and lead towards the System & Updates section in the list. Following this, you need to tap on the Developer Option to lead towards the next window containing the option of USB Debugging. Enable the settings with the available toggle.

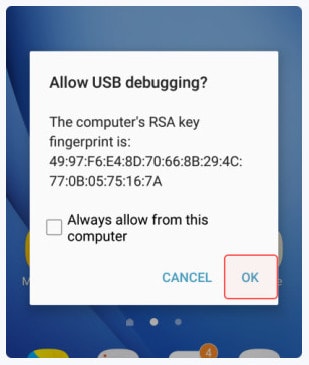
Step 3: Establish Mirroring
A prompt message appears on the screen for the establishment of the connection. Tap “Ok” to successfully attenuate your Android with the PC.
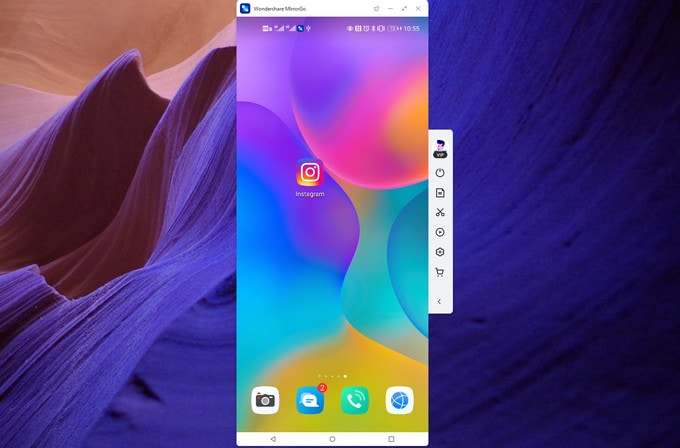
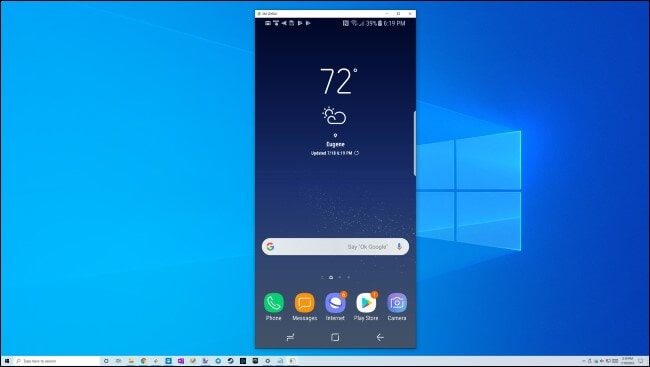
Step 4: Mirroring is done.
Now you can see your Realme C53 phone screen on the computer screen.
Part 3: Screen Mirroring Realme C53 to PC via USB – Scrcpy
You can utilize another conventional mechanism of screen mirroring your Realme C53 to PC using the Phone’s Scrcpy. Initially, you need its extension file on your computer, which can be downloaded from the Internet with ease.
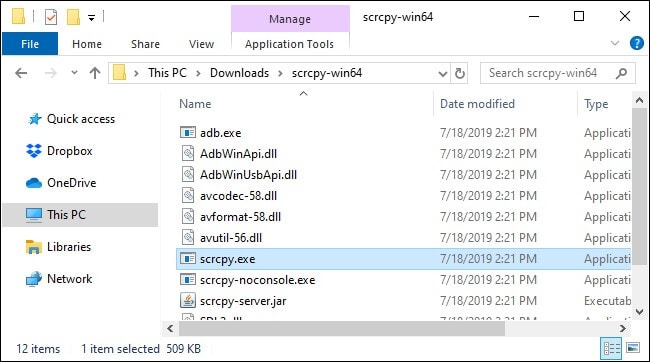
Step 1: Extract and Launch
After downloading the archive folder of Scrcpy on your computer, you need to extract the files and launch the .exe file. However, it is important to connect your Android phone with the PC to avoid prompt errors.
Step 2: Enable USB Debugging on your Phone
You need to open the Settings on your phone and access its About Phone section. If your Developer Options are not enabled, you need to tap on the build number present on the screen multiple times, followed by opening the screen and selecting the option of USB Debugging from the list to have it enabled.
Step 3: Run Scrcpy File
After enabling the USB Debugging mode, you need to re-launch the .exe file on your computer and allow all the prompt messages received on your phone. This will conclusively mirror your Realme C53 screen to PC without any discrepancies. However, it should be kept in mind that the process elapses as soon as you detach your phone from the USB connection.
Part 4: Screen Mirroring Realme C53 to PC Wirelessly – Vysor
Vysor has presented itself as a very strong screen mirroring application for Android phones such as Xiaomi. It provides a USB and ADB connection to its users who wish to mirror Realme C53 to PC using Vysor. This application might be referred to as the best in the market; however, it still presents a very peculiar drawback for many of its consumers. Many people have reported a high drainage rate of their phone’s battery over using Vysor for screen mirroring through a USB connection. This article looks forward to presenting you with the usage of ADB connection in screen sharing Realme C53 to your PC.
Step 1: Initiate USB Debugging on your Phone
You need to have USB debugging enabled on your phone to connect your Realme C53 through the ADB connection. If it is not automatically enabled, you need to simply approach the Settings of your phone and open About Phone. You need to open your Developer Options or have them enabled if never done before by tapping on the build number multiple times before enabling the option of USB debugging inside the Developer options.
Step 2: Open Command Prompt on PC
Turn on the Command Prompt on your PC to initiate an ADB command terminal. For that, you need to type in ‘adb tcpip 5556’ to restart ADB in TCPIP mode.

Step 3: Locate your IP Address
Following this, you need to locate the IP address of your Xiaomi. If you have a phone with an OS version below 6.0, type in:
Adb shell
Netcfg
Conversely, for phones greater than Android 7, sulk in:
Adb shell
ifconfig
A list shall appear on the Command Prompt, showing a list of all the local IP addresses associated with the computer. You need to locate the IP address of your Realme C53 Android phone and have it copied on the clipboard.
Step 4: Close and Re-Type IP Address
You need to exit the ADB window to re-type the IP address for connecting your PC with the phone. Type ‘ADB shell’ to exit the window; however, keep the terminal open. Retype the IP address on the screen.
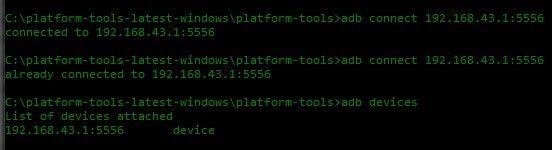
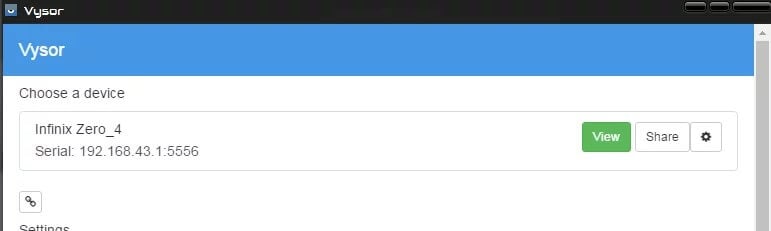
Step 5: Remove USB Cable and Confirm Connection
Following this, you need to remove the USB cable and continue using your phone using the ADB connection through the Wi-Fi and Hotspot connection of your phone. To confirm, you can check the Realme C53 device connected through Vysor to observe it active on the list. You can simply connect to the phone in a normal manner for screen mirroring Realme C53 to PC.
Part 5: Screen Mirroring Realme C53 to PC with Mi PC Suite
Step 1: Download Mi PC Suite
To successfully screen share your Realme C53 to PC, you can access the official website of Mi PC Suite to have it downloaded on the PC.
Step 2: Launch the PC Suite
After downloading the application, you need to simply launch it and observe the screen on the front showing the option of Connect your Device. You need to attach your Realme C53 phone to your PC using USB Cable.
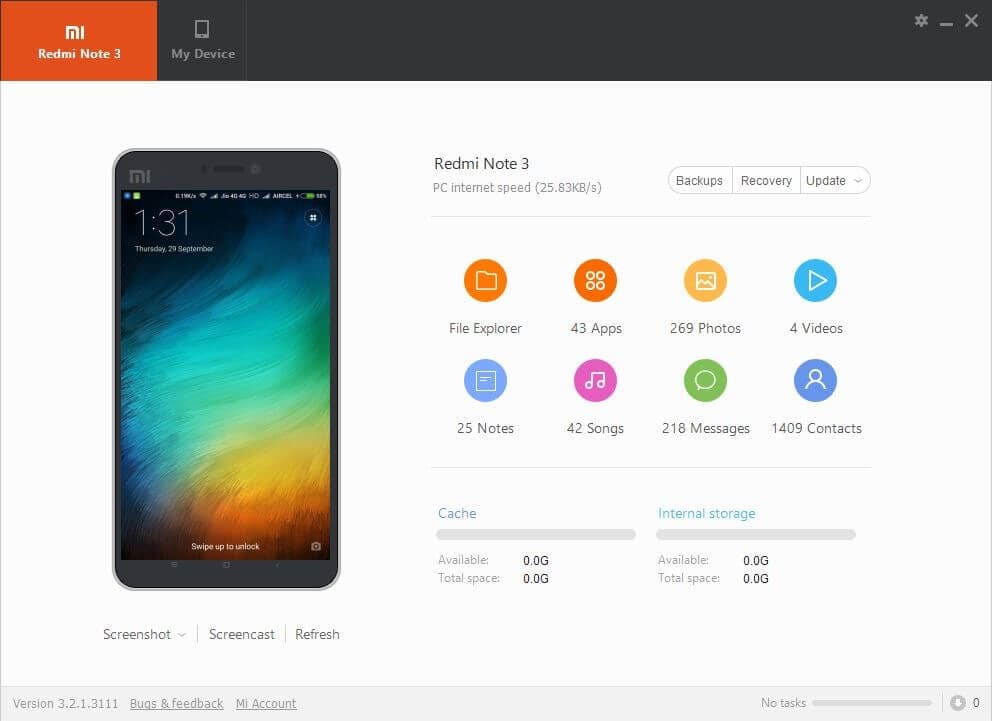
Step 3: Enable Screencast After Successful Connection
Your phone might take a while to install the drivers for connecting to the PC. After the successful installation of drivers, the details of the phone appear on the screen on the front. You simply need to select the option of Screencast present on the bottom of the phone in the PC Suite. This lodges your screen onto the PC successfully.
Conclusion
This article has featured a list of different screen mirroring solutions you can use on your Realme C53 device. If you are looking for an effective Mi screen mirroring on a PC, you can use tools like Dr.Fone Air to mirror smartphones effectively without taking considerable time. The provided solutions are among the best options, saving you time and effort in connecting devices successfully.
Process of Screen Sharing Realme C53 to PC- Detailed Steps
Currently, there are many companies where their employees work across different locations. For these teams, managing work between all members can get complex, and having to continually send files via email to all members. This can get tiring and complex to handle long term.
Comparatively, using the screen-sharing approach will help improve collaboration with multiple people.
In this context, you can use a capable remote access software like TeamViewer to share screens to PC from multiple devices, like Android-based smartphones and tablets. This helps professionals improve their teamwork, coordination, and interaction on projects, to name one benefit.
Read on to learn more about this software and how to screen share Android devices to it.
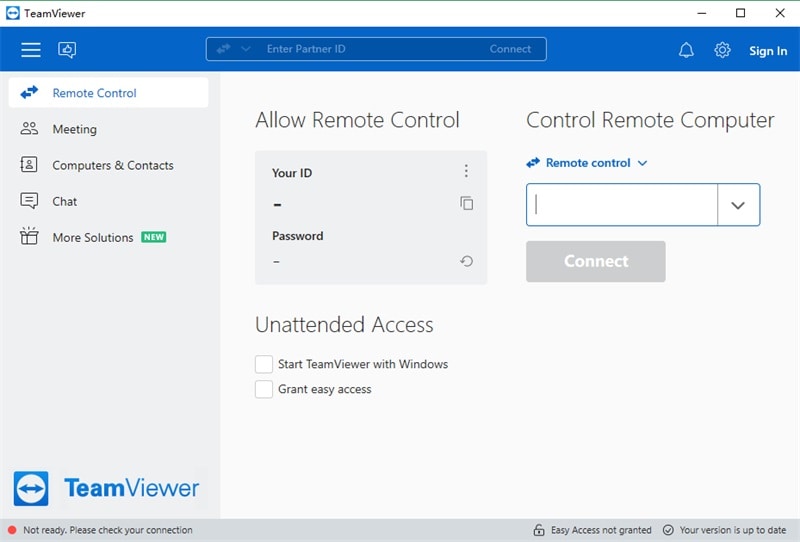
Part 1. What is TeamViewer?
TeamViewer is a remote access management platform for companies and regular people. They use it for better team activity management, especially remote teams. They can experience better work productivity when using this software, like with the screen-sharing features.
The latter allows for screen-to-screen content broadcasting that many people from varying locations. This is useful for multi-member meetings.
Key Features:
- Password protects the meetings from unauthorized access.
- Screen share to PC from different devices/apps.
- Handle around 10 video streams per remote control or meeting session.
- Set scheduled meetings.
Part 2. Key Benefits of the TeamViewer Screenshare Tool
When users operate with TeamViewer to screen-share to PC, there are many advantages they can enjoy. Here are some of them, explained in points for your reference.
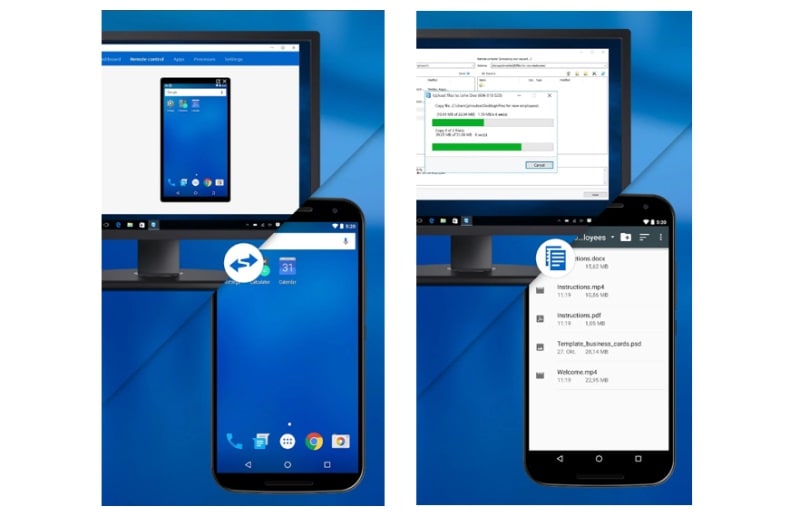
- Improved collaboration- Professionals in different sectors and sizes can collaborate better using the TeamViewer screen-sharing feature. Organizers can share their Android screens with different meeting participants. And then the latter can work on the documents from any location or device.
- Streamlined productivity- TeamViewer users can easily share their data, like documents and presentations, with different users in real-time for discussion. This is instead of the conventional method of individually emailing them for review.
- Better onboarding and tutoring- Professionals using TeamViewer can do onboarding and training processes. For example, by sharing the screen with participants, they can visually show how processes or software types work.
- More robust Security- TeamViewer runs with AES (265-bit) encryption for sessions with RSA public/private key exchange support. This assures a safe and more controlled screen-sharing experience compared to other alternatives.
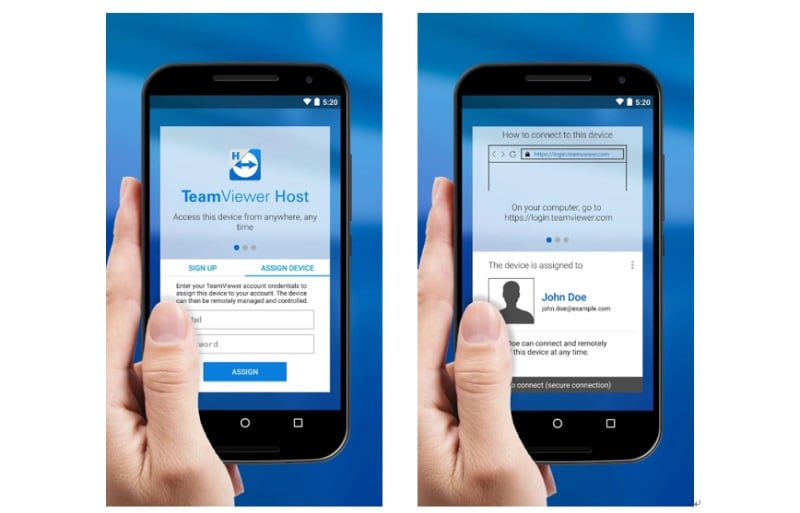
To correctly share the screen to PC, TeamViewer users can access it via Android smartphones or tablets. Here are the steps to share the screen with this platform.
Step 1: On the Android device, visit Google Play Store > install TeamViewer Host .
Step 2: If you do not have an account here, create a new one or log in.
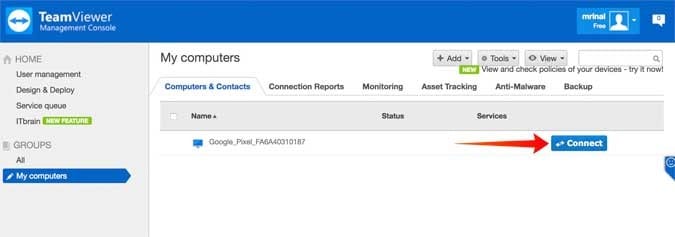
Step 3: On the PC (Windows/Linux/macOS), visit the login page via any preferred browser > Sign into the account that you created.
Step 4: A list of synced devices will appear. Tap the Connect button beside the Android device you share the screen from.
Step 5: The “Launch the TeamViewer” prompt will appear > Press OK. Before this, download and launch the app on your PC.
Step 6: The TeamViewer application will appear on your PC in a new window.
Step 7: Give the software permission for TeamViewer screen sharing on the Android smartphone. This will come up as a prompt “Host will start capturing everything that’s displayed on your screen” on your phone.
Step 8: Press Start Now > Don’t Show Again.
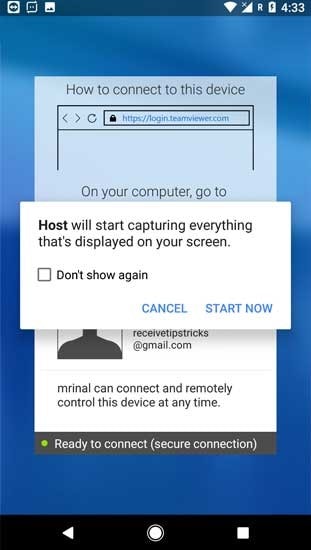
Step 9: The Android device screen will start sharing on the PC.
Part 4. TeamViewer Reviews - Pros & Cons & Ratings
For screen sharing to PC, many companies globally turn to TeamViewer as their primary tool. Here’s the average rating of the software from users’ feedback.
Rating: 4.5 out of 5 (G2 )
Different users from companies have hailed the best user experience from this software- here are some of these reviews.
| User | Reviews |
|---|---|
| Eileen Currier | “This is a very User-Friendly software that allows someone to easily connect and fix problems.” |
| Alexandre Lundgren | “I am just impressed by the quality of TeamViewer. It is easy to learn and so powerful.” |
You will see certain advantages and disadvantages of this software when you use it to screen share to a PC.
Pros:
- Users can access it without getting an account as well.
- Easy functionality.
- Three concurrent sessions can also work with the single-user TeamViewer Remote Access plan, which costs less.
Cons:
- The free plan has limited benefits.
- Business users must pay high amounts to get a license for entire teams.
Part 5. Better Alternative for the TeamViewer Screenshare Tool
TeamViewer is helpful for screen sharing, but it is slightly complex. Besides, screen mirroring is a better alternative. During this, you can better control the elements on the screen or in-person meetings. On that note, Wondershare Dr.Fone Air is helpful software.
It is simple to use, and the software allows smooth wireless screen mirroring from Android and iOS smartphones onto Mac or Windows PC. The solution is free as well.
Price: Free
Features:
- Cross-platform.
- Easy and secure screen mirroring with controlled authorization.
- No need to attach cables or Bluetooth- it works wirelessly.
- Control screen elements like rotating screen, zoom in/zoom out, etc.
How to use it for Android-to-PC screen mirroring?
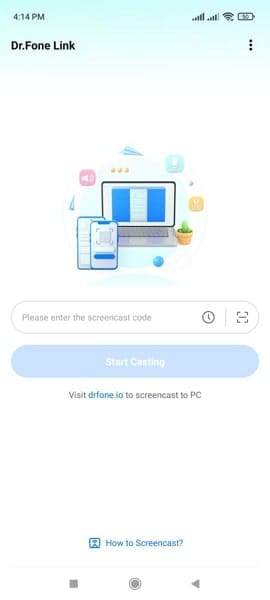
Download the Dr.Fone Link App on your Android smartphone.
Go to the official site on the PC via your preferred browser.
Connect the Realme C53 devices to the same network.
Sync the Realme C53 devices using the QR code/nine-digit Cast Code.
Finally, the screen mirroring process will begin.
Conclusion
TeamViewer is one of the best solutions users can use for professional remote team collaboration. The screen-sharing functionality is helpful for broadcasting content from an Android phone to a PC. For a more effortless experience, screen mirroring with Dr.Fone Air software works. So, you should consider that as well.
Also read:
- [Updated] In 2024, Unveiling the Full Potential of PowerDirector '24
- [Updated] Streamline Editing Workflow with YouTube Video Editor for 2024
- 2024 Approved Unrivaled Narratives Crafted in Eight Film Fields
- 8 Best Apps for Screen Mirroring Motorola Moto G73 5G PC | Dr.fone
- How to Cast Nokia 130 Music to Computer for iPhone and Android? | Dr.fone
- How to Screen Mirroring Nokia 130 Music? | Dr.fone
- In 2024, 8 Best Apps for Screen Mirroring Oppo Find N3 PC | Dr.fone
- In 2024, Expert Choices 17 Tools to Remove Picture Margins
- In 2024, GiggleGridsGuild FunnyFrameFactory
- In 2024, How To Stream Anything From Samsung Galaxy A14 4G to Apple TV | Dr.fone
- Linksys EA9500 Router Review
- Process of Screen Sharing Motorola Moto G04 to PC- Detailed Steps | Dr.fone
- Upgrading AMD Graphics Drivers on Windows 10, 11 & 7: Step-by-Step Guide
- Title: Guide to Mirror Your Realme C53 to Other Android devices | Dr.fone
- Author: Seraphina
- Created at : 2024-10-01 22:32:57
- Updated at : 2024-10-07 19:19:21
- Link: https://screen-mirror.techidaily.com/guide-to-mirror-your-realme-c53-to-other-android-devices-drfone-by-drfone-android/
- License: This work is licensed under CC BY-NC-SA 4.0.