
:max_bytes(150000):strip_icc():format(webp)/camera-56e0976d3df78c5ba0566b37.jpg)
How To Do Nokia C210 Screen Sharing | Dr.fone
How To Do Nokia C210 Screen Sharing

Smartphones by Nokia C210 are rich in functionality and offer multiple benefits to users. However, do we ever wonder about using screen share in Nokia C210 ?
Whether there is a need to show unique clicks or videos on a bigger screen or want to stream amazing content on big TVs or computers, we must know how to screen share on a Nokia C210 phone. It becomes a lot easier to cater to a big audience with big screens.
So today, let us go through a detailed guide on **how to screen share in Nokia C210 ** to smart TVs and computers.
Part 1: Does Screen Sharing Use Bluetooth?
Bluetooth is not used for screen sharing as it does not have the bandwidth required to stream heavy media. Although it is commonly used for wireless data transfer, it is not suited for screen sharing. A major reason behind this is the slowness of Bluetooth, as its maximum speed for data sharing is up to 50MB/s. That makes it unreliable for screen sharing, making Wi-Fi the default choice.
Part 2: How to Share Screen From Nokia C210 Phone to Nokia TV Using Smart View?
Samsung Smart View is a feature in Nokia C210 devices that allows you to **screen share on Nokia C210 ** Smart TV. First introduced as an app, it is now an in-built feature of One UI.
When using the Smart View feature, you can share videos, photos, documents, games, and other things on your Nokia C210 device to your Nokia TV. The Smart View app allows you to use your Nokia C210 device as a virtual remote to control your Smart TV.
Requirements for Smart View App
The Nokia C210 Smart View app was introduced in 2011 to allow Nokia C210 users to share their device’s screen with Nokia TVs. Although it was discontinued on 05 October 2020 and replaced with Smart Things, its existing user base was not disturbed.
If they were already using the Smart View app or downloaded it before discontinuation, they can use it as long as they don’t uninstall it. These are the minimum requirements to use Smart View App on a device:
Android: It can be used on Android devices with Android OS 4.1 or above.
Samsung Smart TVs
All the Samsung Smart TVs after 2015 are compatible with Samsung Smart View. Below is the list of older Nokia TV models that offer Smart View compatibility for Samsung users:
- 2011 LED D7000 and above, PDP D8000 and above.
- 2012 LED ES7500 and above, PDP E8000 and above.
- 2013 LED F4500 and above (except F9000 and above), PDP F5500 and above.
- 2014 H4500, H5500 and above (except H6003/H6103/H6153/H6201/H6203).
- 2015 J4500, J5500 and above (except J6203).
- 2016 K4300, K5300 and above.
Samsung Devices with Smart View Feature
With the introduction of One UI in Samsung devices, the Smart View was added as an in-built feature. All Samsung devices launched with One UI can use the Smart View feature to share their device’s screen with Nokia TV. The Samsung devices that support the Smart View feature include Galaxy S Series, Galaxy Z Series, Galaxy Note Series, Galaxy A Series, Galaxy M Series, and Galaxy F Series.
Steps for Using Smart View to Share Screen
Before explaining the steps, it is important to state that available screens and settings may change depending on your device, Smart TV, or service provider. The Smart View feature is also unavailable on all Samsung devices, and you might need to use the Smart View or Smart Things app.
Ensure that your Samsung device and Smart TV are connected to the same network, and follow these steps for screen sharing:
Step 1: After connecting your device and Smart TV to the same Wi-Fi network, open the “Quick Panel” on your Samsung device. Here, press and enable “Smart View.”
Step 2: Select your Nokia TV among the available devices when Smart View is enabled. Once connected, choose the content you want to share on the TV screen.
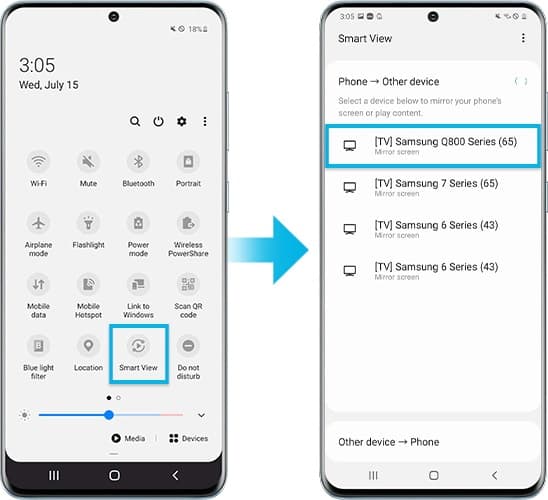
Step 3: You can select your desired content through options like My Photos, My Videos, or My Music. When the desired content is selected, you can enjoy it on a bigger screen.
Part 3: How to Share Screen From Samsung Phones to Other Smart TVs?
If your Smart TV is of another brand instead of Samsung, it is still possible to share the Samsung devices screen with your TV. Multiple tools are available online that can be used to share your Samsung device with your TV, depending on the TV brand. You can use tools like AllShare Cast, Chromecast, or Amazon Firestick.
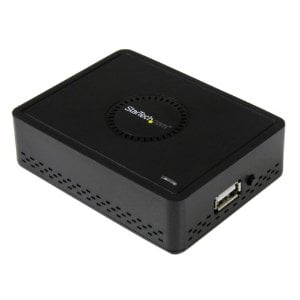
Like Smart View, all wireless screen share tools require your Samsung device and Smart TV to be connected to the same network. Once connected, you will need to plug the respective tool’s adapter into your Smart TV, and you should be able to share your Samsung device. If your Smart TV doesn’t support Miracast, you can use AllShare Cast Wireless Hub for screen sharing.
Part 4. How to Share Screen From Samsung Phone to Computer Using Dr.Fone Air?
After learning about screen sharing to TVs, it is about sharing a Samsung phone screen with a computer. There is no need to worry, as we have a perfect wireless solution.
Dr.Fone Air is a powerful online screen mirror solution allowing screen sharing in Samsung to any computer. It can quickly mirror a Samsung phone to any web browser using a Wi-Fi connection only. Further, it is easy to download Wondershare Dr.Fone Air from its official website.
Key Features of Dr.Fone Air
- It provides great cross-platform support for screen sharing and casting. You can easily share screens from Android or iOS to Windows or Mac.
- You don’t need to give any unnecessary permissions when using Dr.Fone Air. It also doesn’t require Bluetooth or NFC for screen sharing.
- Your data during screen sharing remain protected as it doesn’t require downloading or uploading your content.
Steps of Using Dr.Fone Air for Screen Sharing
Sharing your Samsung phone screen with your Nokia TV using Dr.Fone Air is a simple and quick process. Your Samsung device and Nokia TV needs to be connected to the same Wi-Fi network. Once they are connected, follow these steps for screen sharing:
- Downloading and launching Dr.Fone Air: The first step is to download and launch Dr.Fone Air from the official website. The next step is to connect the Samsung phone and computer with the same Wi-Fi connection.
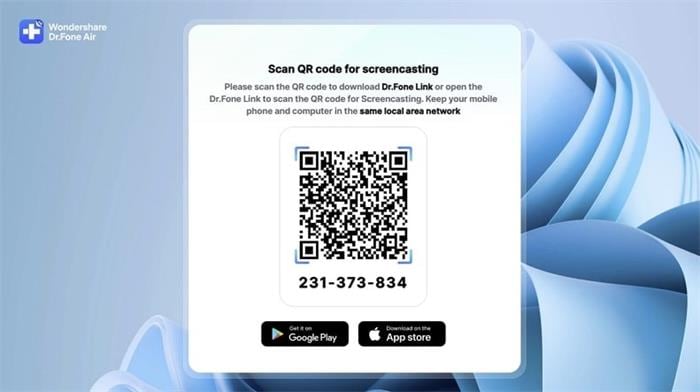
- Using QR or Cast code: The second step is to use the QR or Cast code as shown on the screen of the browser.
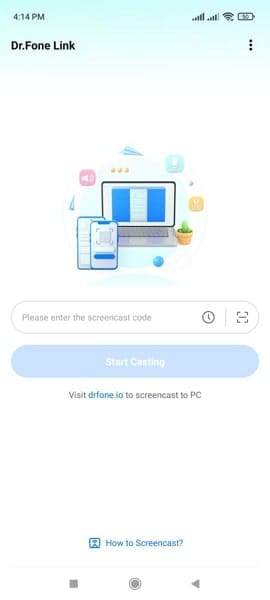
- Mirroring Samsung phone to computer: The Samsung phone will be automatically mirrored to the computer on successful scanning or code entering.

Conclusion
Hope everything is clear to our readers about the different methods to share the screen in Samsung. The detailed steps for screen sharing on Samsung phones to Nokia TVs and other Smart TVs make it easy for users to optimize the benefits of the big screen.
Make sure to check out is using Dr.Fone Air for sharing screens from Samsung phones to computers directly. It is a reliable, secure, and quick method to wirelessly mirror any mobile phone screen to any web browser.
How To Use Allshare Cast To Turn On Screen Mirroring On Nokia C210
Screen mirroring on Nokia C210 devices have become fairly common today. The simple fact is the S5 or even S6 from the Galaxy series of Samsung comes loaded with one of the most powerful and coveted processors available at present.
In addition to that, the 16-megapixel camera and plenty of other features see to the health and fitness concerns as well. For the most effective solutions, find some awesome tips, tricks, instructions, and tutorials to derive the most out of your phone.
Part 1. Why go for Screen Mirroring at All?
The reason why screen mirroring on Nokia C210 is in vogue is that you wish for the display on your phone in larger displays like TV and computer monitors. To enable Screen Mirroring, try and connect an All-Share Cast dongle, Miracast device, HDMI cable, or HomeSync to the display. When the screen’s mirroring is over, enjoy games, multimedia files, and a plethora of other content on the phone with a nice and bigger display.

What you need
It completely depends on the method that you wish to use. You will basically need to set up the corresponding external accessories like the following:
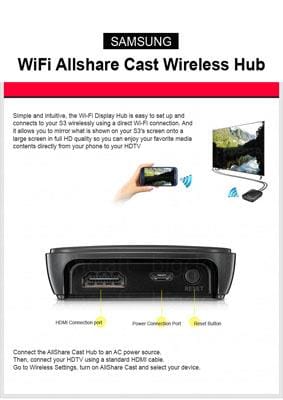
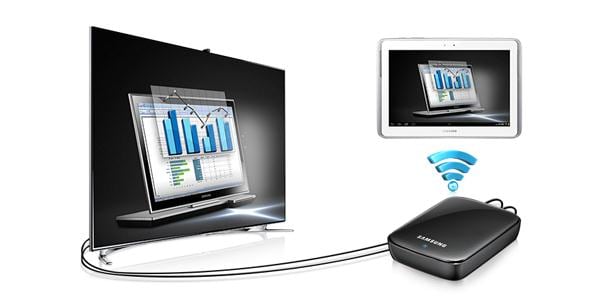
All-Share Cast Wireless Hub: This will allow you to mirror your Galaxy’s screen directly to the HDTV.
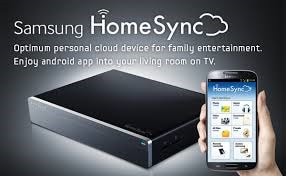
HomeSync: You can stream your Nokia C210’s home screen to the TV using this. Also, you can store your multimedia files on a large capacity home cloud.
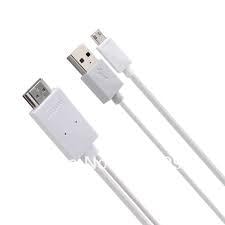
HDMI Cable: In order to transmit high-definition media data from a mobile device to any receiving display like an HDTV, this cable proves indispensable.
Miracast: This functions as a receiving device for streams from your phone. At the same time, you can decode them for your TV or any other supported display.
Part 2. How to enable Screen Mirroring on Nokia C210
Follow these steps carefully:
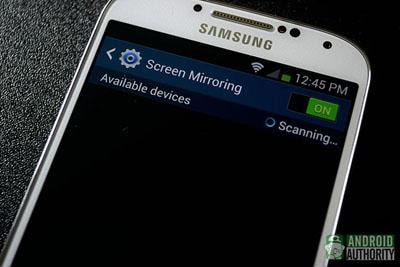
-Go to ‘quick settings’
-Tap on the ‘Screen Mirroring’ icon and get it enabled.
Only after this, you can enable the screen mirroring process with AllShare Cast.
How to screen mirror from Nokia C210 to a TV using AllShare Cast
Firstly, connect AllShare Cast to your TV. This is how:
Turn on the TV: Ensure that the television is powered on prior to everything else.

Connect the charger to the power socket of the AlllShare Cast device: Few models have a built-in battery or derive power from the TV without any other external power source. However, to stay away from any problem, check to see that the charger is connected to the AllShare Cast device.
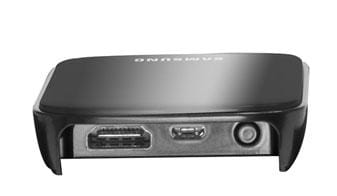
Connect the TV to your AllShare Cast device using an HDMI cable
In case the input is not set properly, adjust to match the port used by the HDMI cable.
At a time when AllShare Cast device’s status indicator blinks red, press the ‘reset’ button.
AllShare Cast device and the HDTV is connected now.
Now, to enable screen mirroring on Nokia C210.
Select the ‘Home’ button on the home screen of your phone.
From the home screen, pull ‘quick settings panel’ using your two fingers.
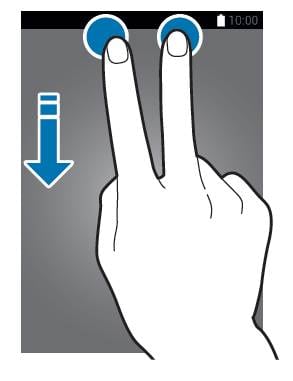
Tap on the ‘screen mirroring’ icon to enable the process on your Nokia C210.

When your phone detects all the nearby devices, select AllShare Cast’s dongle name and enter the PIN as the TV screen shows.
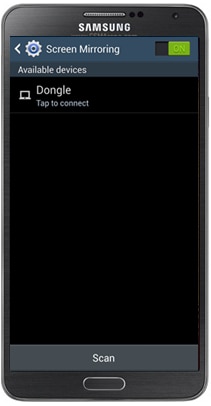
Now the screen mirroring is complete.
Part 3. How to Screen Mirror from Nokia C210 to a Samsung Smart TV
Follow these procedures:
Turn on the television.
Press ‘input’ or ‘source’ button from the Samsung SmartTV remote.
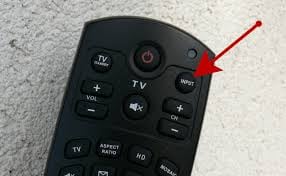
Select ‘Screen Mirroring’ from the Smart TV screen.
Go to ‘quick settings’ by tapping on screen mirroring.
Your phone will make a list of all the available devices that are present for screen mirroring.
Select Samsung Smart TV.
So, the process is complete and you can get on with it. However, problems may arise and you can resolve your queries once you keep a track of what’s happening with others and also stay informed on the net.
Part 4. Recommend Wondershare Dr.Fone Android Recorder to Readers
Wondershare MirrorGo Android Recorder is a tool that can let you mirror your Sumsang Galaxy to PC. With MirrorGo Android Recorder, you also can play the most popular games (like Clash royale, clash of clans, Hearthstone …) on your PC easily and smoothly. You won’t miss any messages with MirrorGo, you can reply to it quickly.
MirrorGo Android Recorder
Mirror your Nokia C210 deviceto your computer!
- Play Android Mobile Games on your Computer with your Keyboard and Mouse for better control.
- Send and receive messages using your computer`s keyboard including SMS, WhatsApp, Facebook, etc.
- View multiple notifications simultaneously without picking up your phone.
- Use android apps on your PC for full-screen experience.
- Record your classic gameplay.
- Screen Capture at crucial points.
- Share secret moves and teach next level play.
3981454 people have downloaded it
Best 3 Nokia C210 Emulator for Mac to Run Your Wanted Android Apps
Mac OS, on the other hand, is a wonderful operating system used by Apple Inc. on it’s Mac PC and MacBook. It has a marvelous user interface and great features. It will be fantastic if we were able to use Android apps on Mac PC. Luckily, it is possible by using an emulator. In this article, we will learn about the five best Android Emulators for Mac.
Part 1. Why You Would Run Android Apps on Mac
- • To run around 1.2 million apps on Mac from Google Play Store.
- • To play tons of Android games on larger screen.
- • People, who spend a good amount of time in front of desktop, will find it more convenient if they were able to use apps like WeChat, WhatsApp, Viber, Line etc. on their Mac.
- • App developer can test their apps on the desktop before sending it to the Google Play Store for user reviewing.
- • Some Emulator supports battery and GPS widgets. So, developers can test their apps based on the battery performance and can also test how their apps will work on different geographical locations.
Part 2. Top 3 Android Emulator for Mac
1. BlueStacks
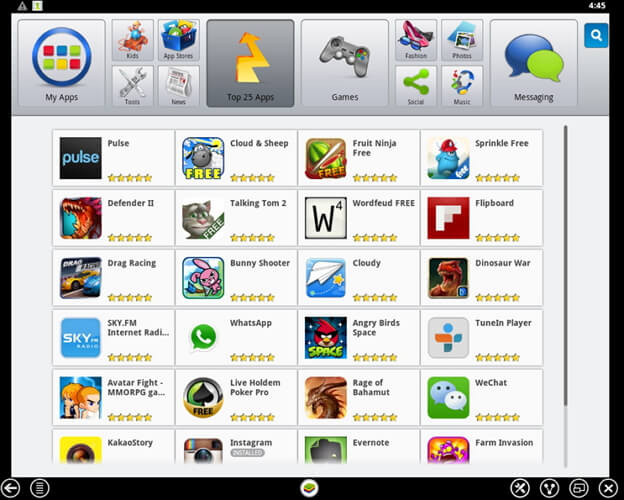
BlueStacks App Player is probably the most popular emulator for running Android apps on Mac. It is available for both Mac and Windows. It creates a virtual copy of Android OS apps on the guest OS. It uses the unique “LayerCake” technology that allows you to run android apps on your PC without any external Virtual Desktop Application. Once install user can enjoy Android games and apps such as News Feeds, Social Network on a large screen.
BlueStacks maintain an internal search manager that allows any apk, the package file format that is used to distribute and install application and middleware on any Android device, to install within it. It can be
Advantage
- • .apk files can be installed into BlueStacks from Mac simply by double clicking.
- • It can also sync between the apps on Mac and the android phone or tablet by installing BlueStacks Cloud Connect app on Android Device.
- • Apps can be launched directly from Mac dashboard.
- • No need to configure additional Internet connection as it automatically gets the Internet connection of host computer.
- • BlueStacks App Player is available for both Windows and Mac.
Disadvantage
- When running complex graphic apps it fails to respond to the input in a timely fashion.
- It does not provide any mechanism to uninstall cleanly from the host computer.
Download
- • It can be downloaded from the official website of BlueStacks . It is absolutely free.
How to use
Download BlueStacks for Mac OS X from the official website of BlueStacks and install it like any other software on your PC. Once installed, it will boot up to its Home Screen. From there you can find the installed apps, find new apps in the “Top Charts”, search apps, play games and change settings. Mouse will be the basic touch controller. To access Google Play you will have to associate a Google Account with BlueStacks.
2. Genymotion
Genymotion is a fast and wonderful third party emulator that can be used to create a virtual environment for Android. It is the fastest Android emulator on the earth. It can be used to develop, test and run Android apps on Mac PC. It is available for Windows, Mac, and Linux machine. It is easy to install and can create a customized android device. You can start multiple virtual devices at the same time. It has the pixel perfect functionality so you can be precise to your UI development. By using the OpenGL acceleration it can achieve the best 3D performance. It directly commands the virtual devices sensors with Genymotion sensors. It is evolution of the Android open source project and already trusted by about 300,000 developers around the globe.
Advantage
- • Best 3D performance is achieved through OpenGL acceleration.
- • Support full screen option.
- • Can start multiple virtual devices at the same time.
- • Fully compatible with ADB.
- • Available for Mac, Windows and Linux machine.
Disadvantage
- • Require virtual Box to run Genymotion.
- • Cannot deploy Android machine offline.
Download
- Genymotion can be downloaded from the official website of Genymotion. The latest version of Genymotion is 2.2.2. You have to choose a package that meets your requirements.
How to use
- 1. Download Genymotion. You have to create an account to download it.
- 2. Open the .dmg installer. It will also install Oracle VM Virtual Box on your computer.
- 3. Move the Genymotion and Genymotion Shell to application directory.
- 4. Click the icon from Application directory and the following window will appear.
- 5. To add virtual device click on the add button.
- 6. Click on the connect button.
- 7. Enter your user name and password to connect to the Genymotion Cloud and click on the connect button. After connecting with the Genymotion cloud the following screen will appear.
- 8. Select a virtual machine and click on Next.
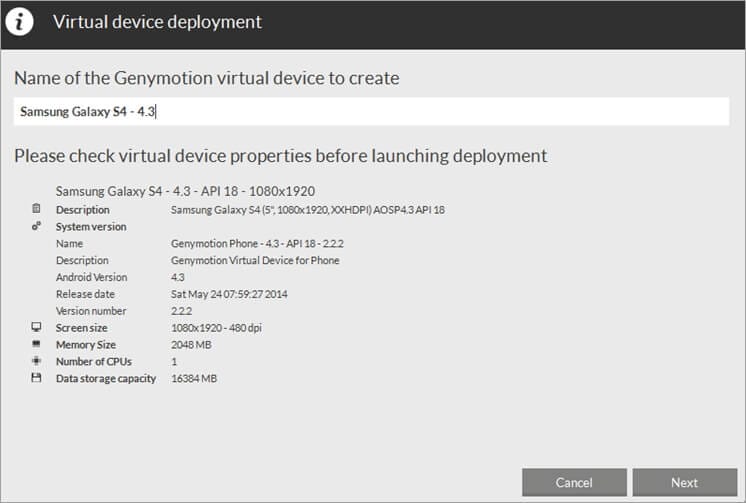
- 9. Give a name for the Virtual machine like below and click on Next.
- 10. Your virtual device will be now be downloaded and deployed. Click on the Finish button after successful deployment of your virtual machine.
- 11. Click on the Play button to start the new virtual machine and enjoy.
3. Andy
Andy is an open source emulator that allows developers and users to enjoy more robust apps, to experience them in multiple device environments, and to stop being constraint by the limits of device storage, screen size or separate OS. User can update their Android through Andy. It provides seamless sync between desktop and mobile device. User can use their phone as joystick while playing games.
Advantage
- • It provides a seamless sync between desktop and mobile device.
- • Enable Android OS update.
- • Enable app download from any desktop browser to Andy OS.
- • Phones can be used as joystick while playing games.
- • Unlimited storage expansion.
Disadvantage
- • Increase CPU usage.
- • Consumes a lot of physical memory.
Download
- • You can download Andy from <www.andyroid.net>.
How to Use
- 1. Download and install Andy.
- 2. Launch Andy. It will take about a minute to boot and then it should see a welcome screen.
- 3. Sign into your Google Account and complete the rest of the setup screen. You will be asked to provide your Google Account Information to 1ClickSync, the app that let’s you sync between Andy and the mobile device

Also read:
- How to Mirror Sony Xperia 1 V to Mac? | Dr.fone
- How to Screen Mirroring Lava Blaze Curve 5G to PC? | Dr.fone
- In 2024, How Poco C55 Mirror Screen to PC? | Dr.fone
- How Oppo Find X7 Ultra Mirror Screen to PC? | Dr.fone
- How to Cast Xiaomi Redmi K70E Screen to PC Using WiFi | Dr.fone
- How to Screen Mirroring Realme V30? | Dr.fone
- Full Guide on Mirroring Your Nubia Z50S Pro to Your PC/Mac | Dr.fone
- Recommended Best Applications for Mirroring Your Vivo X Fold 2 Screen | Dr.fone
- How Oppo A58 4G Mirror Screen to PC? | Dr.fone
- In 2024, How to Cast Xiaomi 14 Ultra to Computer for iPhone and Android? | Dr.fone
- In 2024, Best 3 Lava Yuva 2 Pro Emulator for Mac to Run Your Wanted Android Apps | Dr.fone
- Guide to Mirror Your Infinix Hot 30 5G to Other Android devices | Dr.fone
- In 2024, Full Guide on Mirroring Your Poco X5 to Your PC/Mac | Dr.fone
- In 2024, A Guide Samsung Galaxy M14 5G Wireless and Wired Screen Mirroring | Dr.fone
- In 2024, Overview of the Best Infinix Note 30 Screen Mirroring App | Dr.fone
- In 2024, How to Cast Oppo K11x Screen to PC Using WiFi | Dr.fone
- In 2024, Guide to Mirror Your OnePlus 12R to Other Android devices | Dr.fone
- 3 Facts You Need to Know about Screen Mirroring Lava Blaze Pro 5G | Dr.fone
- How to Stream Apple iPhone XR to Computer? | Dr.fone
- In 2024, 8 Best Apps for Screen Mirroring Tecno Camon 20 Pro 5G PC | Dr.fone
- In 2024, How to Mirror Apple iPhone 8 to iPad? | Dr.fone
- Recommended Best Applications for Mirroring Your Vivo Y17s Screen | Dr.fone
- 8 Best Apps for Screen Mirroring Motorola Razr 40 PC | Dr.fone
- How To Stream Anything From Samsung Galaxy A14 4G to Apple TV | Dr.fone
- Top 4 Ways for Apple iPhone 13 Pro Max to Mac Mirroring | Dr.fone
- How Can Oppo A1x 5GMirror Share to PC? | Dr.fone
- In 2024, Top 9 Vivo Y77t Monitoring Apps for Parental Controls | Dr.fone
- The Easiest Methods to Hard Reset Infinix Note 30i | Dr.fone
- Unlock Apple ID without Phone Number On Apple iPhone 15
- 11 Proven Solutions to Fix Google Play Store Not Working Issue on Oppo Reno 11 Pro 5G | Dr.fone
- How To Get the Apple ID Verification Code On Apple iPhone SE (2022) in the Best Ways
- Complete guide for recovering messages files on Itel S23+
- Complete Review & Guide to Techeligible FRP Bypass and More For Honor 80 Pro Straight Screen Edition
- How to Fix Unfortunately, Contacts Has Stopped Error on Samsung Galaxy F34 5G | Dr.fone
- Unlocking iPhone 6s Plus Lock Screen 3 Foolproof Methods that Actually Work | Dr.fone
- Updated Discover the Best Video Editors for Windows 11 Free, Paid, and Trial Options
- About Xiaomi 14 Ultra FRP Bypass
- Updated In 2024, Looking for a Free and Open Source Video Editor with Cross-Platform Support? Kdenlive Video Editor Is Great but Is It the Best? Find Out From Our Complete Kdenlive Review
- Updated In 2024, The Recommended Natural AI Hindi Voice Generator
- 3 Things You Must Know about Fake Snapchat Location On Infinix Note 30 5G | Dr.fone
- In 2024, Xiaomi Redmi Note 12T Pro ADB Format Tool for PC vs. Other Unlocking Tools Which One is the Best?
- How To Erase Apple iPhone 7 Data Permanently | Dr.fone
- How to play HEVC H.265 video on Galaxy Z Flip 5?
- In 2024, Ultimate Guide on Itel FRP Bypass
- Unlock android phone if you forget the Motorola Edge+ (2023) password or pattern lock
- In 2024, How to Transfer Contacts from OnePlus Ace 2 Pro to Outlook | Dr.fone
- Does Vivo X100 Have Find My Friends? | Dr.fone
- How to Use Phone Clone to Migrate Your OnePlus Nord N30 SE Data? | Dr.fone
- How to Track Vivo S17e Location without Installing Software? | Dr.fone
- How do I reset my Realme C67 5G Phone without technical knowledge? | Dr.fone
- Your Complete Guide To Reset Tecno Pova 6 Pro 5G | Dr.fone
- In 2024, Delete Gmail Account With/Without Password On Infinix Zero 5G 2023 Turbo
- Title: How To Do Nokia C210 Screen Sharing | Dr.fone
- Author: Seraphina
- Created at : 2024-05-20 08:35:02
- Updated at : 2024-05-21 08:35:02
- Link: https://screen-mirror.techidaily.com/how-to-do-nokia-c210-screen-sharing-drfone-by-drfone-android/
- License: This work is licensed under CC BY-NC-SA 4.0.
