
In 2024, Best 3 Itel A60s Emulator for Mac to Run Your Wanted Android Apps | Dr.fone
Best 3 Itel A60s Emulator for Mac to Run Your Wanted Android Apps
Mac OS, on the other hand, is a wonderful operating system used by Apple Inc. on it’s Mac PC and MacBook. It has a marvelous user interface and great features. It will be fantastic if we were able to use Android apps on Mac PC. Luckily, it is possible by using an emulator. In this article, we will learn about the five best Android Emulators for Mac.
Part 1. Why You Would Run Android Apps on Mac
- • To run around 1.2 million apps on Mac from Google Play Store.
- • To play tons of Android games on larger screen.
- • People, who spend a good amount of time in front of desktop, will find it more convenient if they were able to use apps like WeChat, WhatsApp, Viber, Line etc. on their Mac.
- • App developer can test their apps on the desktop before sending it to the Google Play Store for user reviewing.
- • Some Emulator supports battery and GPS widgets. So, developers can test their apps based on the battery performance and can also test how their apps will work on different geographical locations.
Part 2. Top 3 Android Emulator for Mac
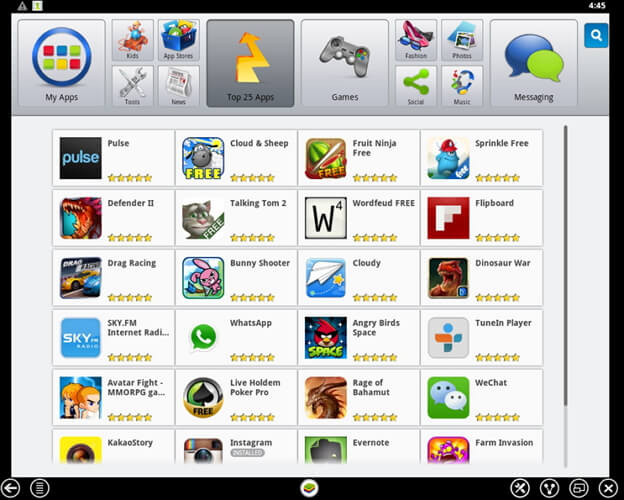
1. BlueStacks
BlueStacks App Player is probably the most popular emulator for running Android apps on Mac. It is available for both Mac and Windows. It creates a virtual copy of Android OS apps on the guest OS. It uses the unique “LayerCake” technology that allows you to run android apps on your PC without any external Virtual Desktop Application. Once install user can enjoy Android games and apps such as News Feeds, Social Network on a large screen.
BlueStacks maintain an internal search manager that allows any apk, the package file format that is used to distribute and install application and middleware on any Android device, to install within it. It can be
Advantage
- • .apk files can be installed into BlueStacks from Mac simply by double clicking.
- • It can also sync between the apps on Mac and the android phone or tablet by installing BlueStacks Cloud Connect app on Android Device.
- • Apps can be launched directly from Mac dashboard.
- • No need to configure additional Internet connection as it automatically gets the Internet connection of host computer.
- • BlueStacks App Player is available for both Windows and Mac.
Disadvantage
- When running complex graphic apps it fails to respond to the input in a timely fashion.
- It does not provide any mechanism to uninstall cleanly from the host computer.
Download
- • It can be downloaded from the official website of BlueStacks . It is absolutely free.
How to use
Download BlueStacks for Mac OS X from the official website of BlueStacks and install it like any other software on your PC. Once installed, it will boot up to its Home Screen. From there you can find the installed apps, find new apps in the “Top Charts”, search apps, play games and change settings. Mouse will be the basic touch controller. To access Google Play you will have to associate a Google Account with BlueStacks.
2. Genymotion
Genymotion is a fast and wonderful third party emulator that can be used to create a virtual environment for Android. It is the fastest Android emulator on the earth. It can be used to develop, test and run Android apps on Mac PC. It is available for Windows, Mac, and Linux machine. It is easy to install and can create a customized android device. You can start multiple virtual devices at the same time. It has the pixel perfect functionality so you can be precise to your UI development. By using the OpenGL acceleration it can achieve the best 3D performance. It directly commands the virtual devices sensors with Genymotion sensors. It is evolution of the Android open source project and already trusted by about 300,000 developers around the globe.
Advantage
- • Best 3D performance is achieved through OpenGL acceleration.
- • Support full screen option.
- • Can start multiple virtual devices at the same time.
- • Fully compatible with ADB.
- • Available for Mac, Windows and Linux machine.
Disadvantage
- • Require virtual Box to run Genymotion.
- • Cannot deploy Android machine offline.
Download
- Genymotion can be downloaded from the official website of Genymotion. The latest version of Genymotion is 2.2.2. You have to choose a package that meets your requirements.
How to use
- 1. Download Genymotion. You have to create an account to download it.
- 2. Open the .dmg installer. It will also install Oracle VM Virtual Box on your computer.
- 3. Move the Genymotion and Genymotion Shell to application directory.
- 4. Click the icon from Application directory and the following window will appear.
- 5. To add virtual device click on the add button.
- 6. Click on the connect button.
- 7. Enter your user name and password to connect to the Genymotion Cloud and click on the connect button. After connecting with the Genymotion cloud the following screen will appear.
- 8. Select a virtual machine and click on Next.
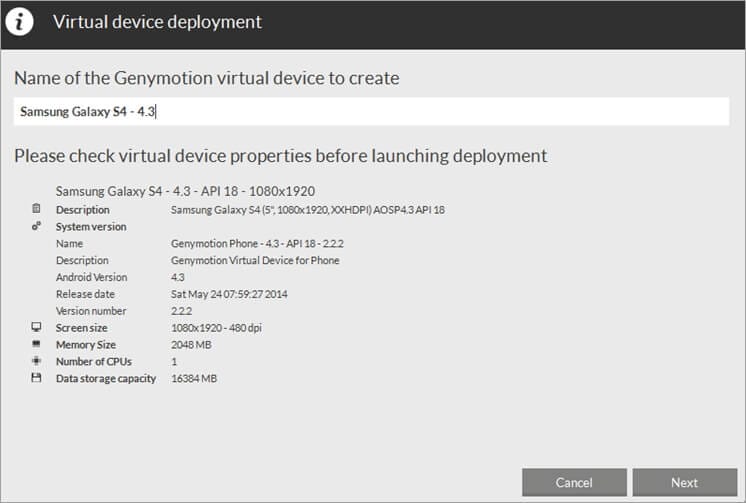
- 9. Give a name for the Virtual machine like below and click on Next.
- 10. Your virtual device will be now be downloaded and deployed. Click on the Finish button after successful deployment of your virtual machine.
- 11. Click on the Play button to start the new virtual machine and enjoy.
3. Andy
Andy is an open source emulator that allows developers and users to enjoy more robust apps, to experience them in multiple device environments, and to stop being constraint by the limits of device storage, screen size or separate OS. User can update their Android through Andy. It provides seamless sync between desktop and mobile device. User can use their phone as joystick while playing games.
Advantage
- • It provides a seamless sync between desktop and mobile device.
- • Enable Android OS update.
- • Enable app download from any desktop browser to Andy OS.
- • Phones can be used as joystick while playing games.
- • Unlimited storage expansion.
Disadvantage
- • Increase CPU usage.
- • Consumes a lot of physical memory.
Download
- • You can download Andy from <www.andyroid.net>.
How to Use
- 1. Download and install Andy.
- 2. Launch Andy. It will take about a minute to boot and then it should see a welcome screen.
- 3. Sign into your Google Account and complete the rest of the setup screen. You will be asked to provide your Google Account Information to 1ClickSync, the app that let’s you sync between Andy and the mobile device

Process of Screen Sharing Itel A60s to PC- Detailed Steps
Currently, there are many companies where their employees work across different locations. For these teams, managing work between all members can get complex, and having to continually send files via email to all members. This can get tiring and complex to handle long term.
Comparatively, using the screen-sharing approach will help improve collaboration with multiple people.
In this context, you can use a capable remote access software like TeamViewer to share screens to PC from multiple devices, like Android-based smartphones and tablets. This helps professionals improve their teamwork, coordination, and interaction on projects, to name one benefit.
Read on to learn more about this software and how to screen share Android devices to it.
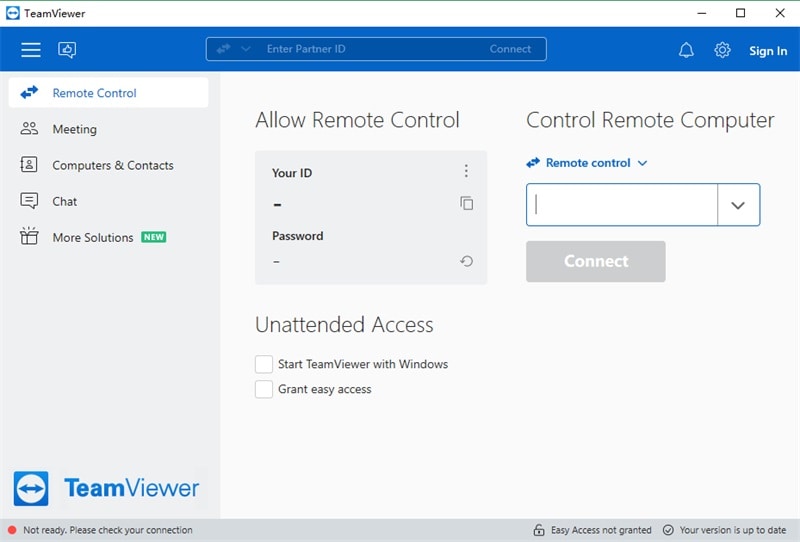
Part 1. What is TeamViewer?
TeamViewer is a remote access management platform for companies and regular people. They use it for better team activity management, especially remote teams. They can experience better work productivity when using this software, like with the screen-sharing features.
The latter allows for screen-to-screen content broadcasting that many people from varying locations. This is useful for multi-member meetings.
Key Features:
- Password protects the meetings from unauthorized access.
- Screen share to PC from different devices/apps.
- Handle around 10 video streams per remote control or meeting session.
- Set scheduled meetings.
Part 2. Key Benefits of the TeamViewer Screenshare Tool
When users operate with TeamViewer to screen-share to PC, there are many advantages they can enjoy. Here are some of them, explained in points for your reference.
- Improved collaboration- Professionals in different sectors and sizes can collaborate better using the TeamViewer screen-sharing feature. Organizers can share their Android screens with different meeting participants. And then the latter can work on the documents from any location or device.
- Streamlined productivity- TeamViewer users can easily share their data, like documents and presentations, with different users in real-time for discussion. This is instead of the conventional method of individually emailing them for review.
- Better onboarding and tutoring- Professionals using TeamViewer can do onboarding and training processes. For example, by sharing the screen with participants, they can visually show how processes or software types work.
- More robust Security- TeamViewer runs with AES (265-bit) encryption for sessions with RSA public/private key exchange support. This assures a safe and more controlled screen-sharing experience compared to other alternatives.
To correctly share the screen to PC, TeamViewer users can access it via Android smartphones or tablets. Here are the steps to share the screen with this platform.
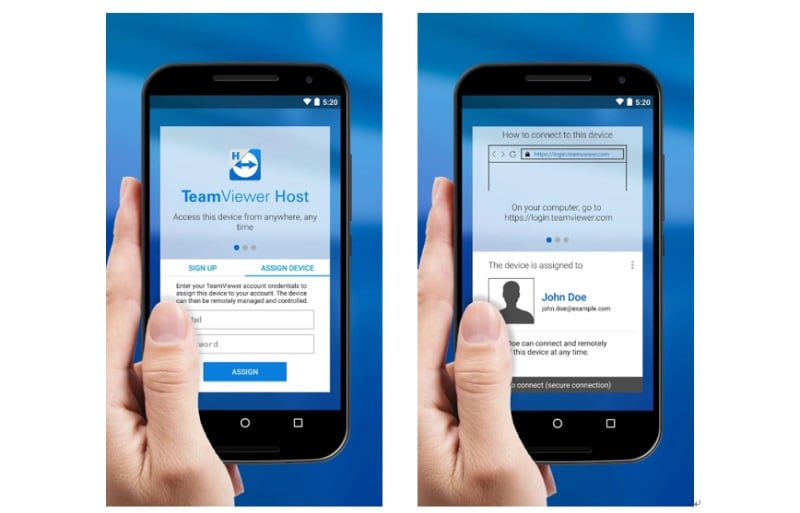
Step 1: On the Android device, visit Google Play Store > install TeamViewer Host .
Step 2: If you do not have an account here, create a new one or log in.
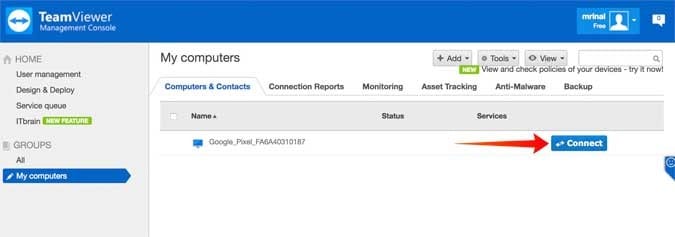
Step 3: On the PC (Windows/Linux/macOS), visit the login page via any preferred browser > Sign into the account that you created.
Step 4: A list of synced devices will appear. Tap the Connect button beside the Android device you share the screen from.
Step 5: The “Launch the TeamViewer” prompt will appear > Press OK. Before this, download and launch the app on your PC.
Step 6: The TeamViewer application will appear on your PC in a new window.
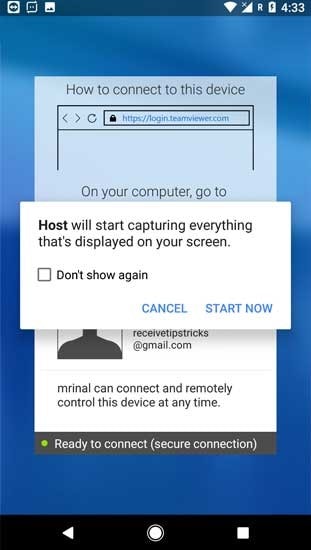
Step 7: Give the software permission for TeamViewer screen sharing on the Android smartphone. This will come up as a prompt “Host will start capturing everything that’s displayed on your screen” on your phone.
Step 8: Press Start Now > Don’t Show Again.
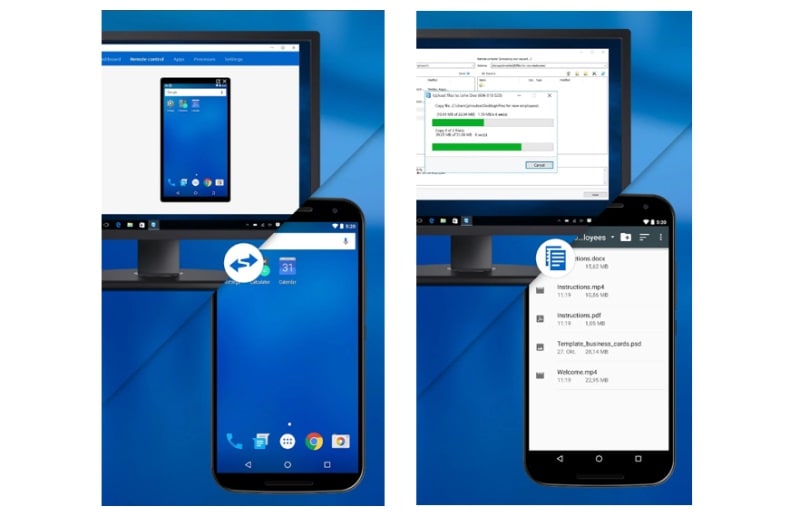
Step 9: The Android device screen will start sharing on the PC.
Part 4. TeamViewer Reviews - Pros & Cons & Ratings
For screen sharing to PC, many companies globally turn to TeamViewer as their primary tool. Here’s the average rating of the software from users’ feedback.
Rating: 4.5 out of 5 (G2 )
Different users from companies have hailed the best user experience from this software- here are some of these reviews.
| User | Reviews |
|---|---|
| Eileen Currier | “This is a very User-Friendly software that allows someone to easily connect and fix problems.” |
| Alexandre Lundgren | “I am just impressed by the quality of TeamViewer. It is easy to learn and so powerful.” |
You will see certain advantages and disadvantages of this software when you use it to screen share to a PC.
Pros:
- Users can access it without getting an account as well.
- Easy functionality.
- Three concurrent sessions can also work with the single-user TeamViewer Remote Access plan, which costs less.
Cons:
- The free plan has limited benefits.
- Business users must pay high amounts to get a license for entire teams.
Part 5. Better Alternative for the TeamViewer Screenshare Tool
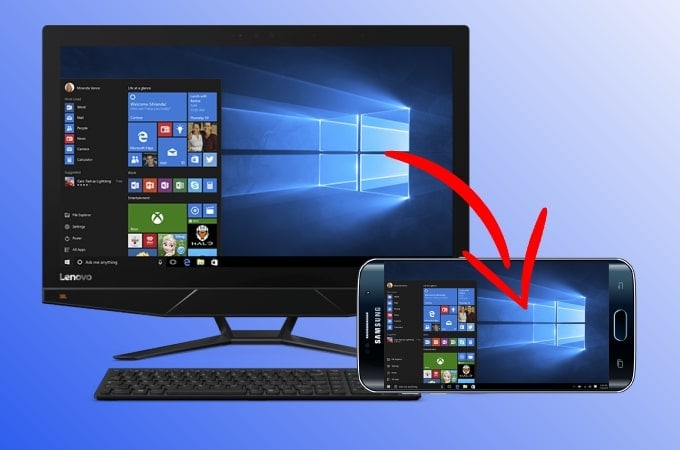
TeamViewer is helpful for screen sharing, but it is slightly complex. Besides, screen mirroring is a better alternative. During this, you can better control the elements on the screen or in-person meetings. On that note, Wondershare Dr.Fone Air is helpful software.
It is simple to use, and the software allows smooth wireless screen mirroring from Android and iOS smartphones onto Mac or Windows PC. The solution is free as well.
Price: Free
Features:
- Cross-platform.
- Easy and secure screen mirroring with controlled authorization.
- No need to attach cables or Bluetooth- it works wirelessly.
- Control screen elements like rotating screen, zoom in/zoom out, etc.
How to use it for Android-to-PC screen mirroring?
Download the Dr.Fone Link App on your Android smartphone.
Go to the official site on the PC via your preferred browser.
Connect the Itel A60s devices to the same network.
Sync the Itel A60s devices using the QR code/nine-digit Cast Code.
Finally, the screen mirroring process will begin.
Conclusion
TeamViewer is one of the best solutions users can use for professional remote team collaboration. The screen-sharing functionality is helpful for broadcasting content from an Android phone to a PC. For a more effortless experience, screen mirroring with Dr.Fone Air software works. So, you should consider that as well.
3 Methods to Mirror Itel A60s to Roku
Back from vacation and want your family members or friends to see your pictures and videos? Instead of showing these pics on a small android screen, it would be more mesmerizing if you showed them on a big Roku screen. But the question arises, is it possible to mirror Itel A60s to Roku? Yes, you can! With technology evolving, there are now many ways that allow individuals to effortlessly mirror Itel A60s to Roku and share whatever is going on a small android screen on a big Roku screen. Just imagine playing counter-strike on a big TV screen.
3 Methods to Mirror Itel A60s to Roku
Method 1 Use Android Mirroring Feature to Mirror
The most genuine and reliable way is to use the Android Mirroring Feature of the Itel A60s device itself. It involves no third-party app. By following a few simple steps, you can easily stream all your Android Device movies and videos to Roku.
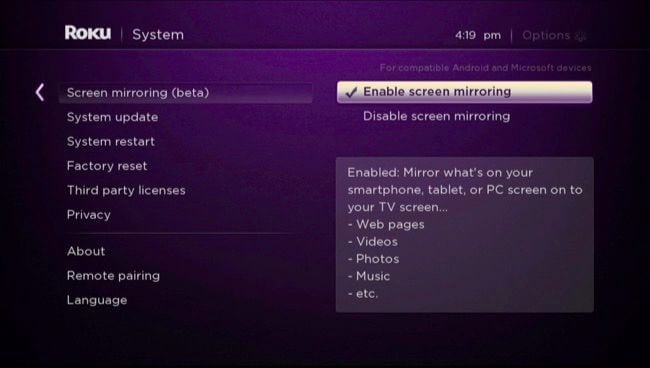
Step 1: Enable the “Screen Mirroring” Feature on Roku
- Enter the settings menu of the Roku device and tap on the option of “System.”
- After that, tap on the option of “Screen Mirroring.”
- Now from here, enable the option of Screen Mirroring.
Step 2: Cast Android to Roku:
- On your Android device, enter the “Settings” menu, and tap on the option of “Display”.
- Here you will find an option of “Cast Screen”. Tap on it.
- Now select the option of the menu followed by the selection of “Enable Wireless Display.”
- Doing so will show your Roku on the section of Cast Screen.
An alternative way for Samsung Users:
- Swipe down the notification panel; here, you will find an option of “Smart View” or “Screen Mirroring”. Tap on it.
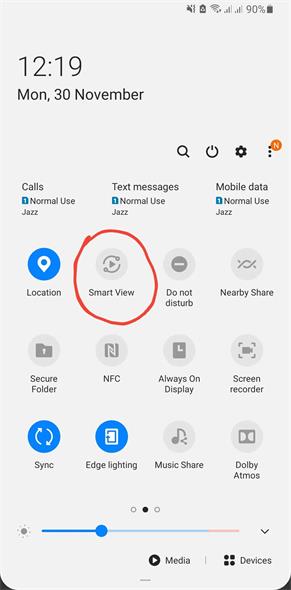
- Doing so will take you to a page where the Itel A60s device will start searching for devices nearby.
- Tap on your Roku device to start sharing your Android screen with the Roku device.
- You must ensure that your Android device is functioning on version 4.4.2 or above before following this method. Also, you need to make sure that your Roku and your Android device is connected to the same network.
Method 2: Use Screen Mirroring App to Mirror Itel A60s to Roku
Screen Mirroring App for Roku is an easy to use application that allows sharing pictures, videos, and documents from your Android device to Roku TV. You are not required to amend any phone or wifi setting on your device. All you need to make sure is that both the Roku and your Android device is connected to the same wifi network. The data is solely captured by the application for mirroring purposes only; no information is stored.
The only drawback of this app is that it still does not support sound; hence to share sound, you need to use Bluetooth speakers.
Step 1: Download the Screen Mirroring Application:
- Unlock your Android device and enter the Google Play Store.
- Download the “Screen Mirroring Application” using this link: https://play.google.com/store/apps/details?id=de.twokit.screen.mirroring.app.roku
Step 2: Mirror Itel A60s Device to Roku:
- Launch the application. The app will start to show all the Itel A60s devices nearby to which you can share your screen.
- Select your Roku device.
Step 3: Add Channel to your Roku:
- On your Roku, tap on “Add Channel” to add a screen mirroring channel.
- The device will take time to process.
- Confirm your action by tapping on “OK” on the app or the Roku remote.
Step 4: Share your Android screen to Roku:
- From the application launched on your Android device, tap on the option of “Start Mirroring”
- After that, tap on “Start Now” from the pop-up screen to permit the app to start capturing your Android device screen.
- And you are done!
Method 3: Use Google Home to mirror Itel A60s to Roku TV
Google Home is an excellent alternative to cast your Android to Roku; however, it only supports a handful of apps.
Step 1: Download Google Home:
- First, you need to download the Google Home application on your Android device.
Step 2: Connect Android Device to Roku
- Launch the application and tap on the “+” icon from the top left corner to reveal a menu.
- From there, select the option of “Set up Device”. From there, tap on “have something already set up”.
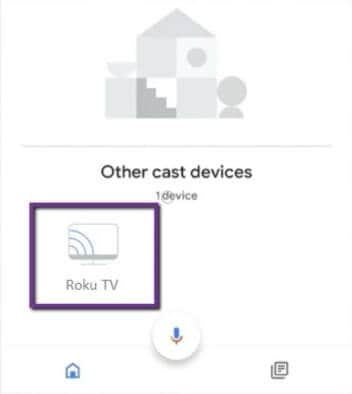
- Now select your Roku device from the Itel A60s devices shown on your Android screen.
- After that, you will be asked to enter the login credentials of your Roku account.
- Your device will then show you on-screen instructions; follow them to connect your Android device to Roku TV successfully.
Step 3: Mirror your Android Screen to Roku
- Lastly, to mirror any video to Roku TV, tap on the “cast” icon from your screen.
Bonus Point: Mirror and Control your Android Device to PC
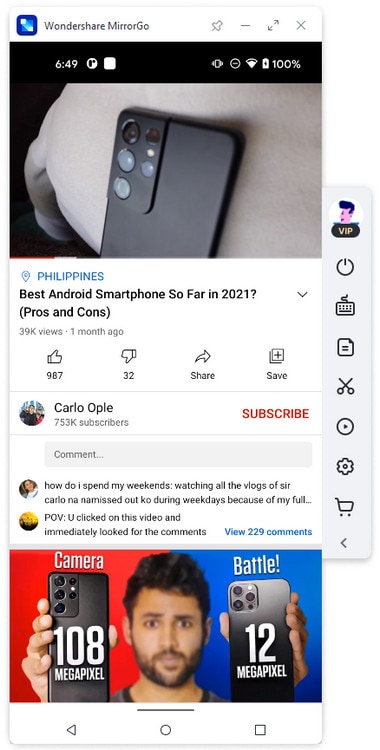
Did you know that you could mirror your android screen to a PC and then control the Android activities via Windows? MirrorGo, an amazing software by Wondershare, has made it all possible! It is an exceptional application that comes with numerous fascinating features. The app is compatible with iOS as well as Android Devices. Here is how you can use them:
Step 1: Download MirrorGo on your Android Device:
- Use this link to install the MirrorGo application to your Android device: MirrorGo.wondershare .
- After installation, launch the application.
Step 2: Connect the Android Device to PC:
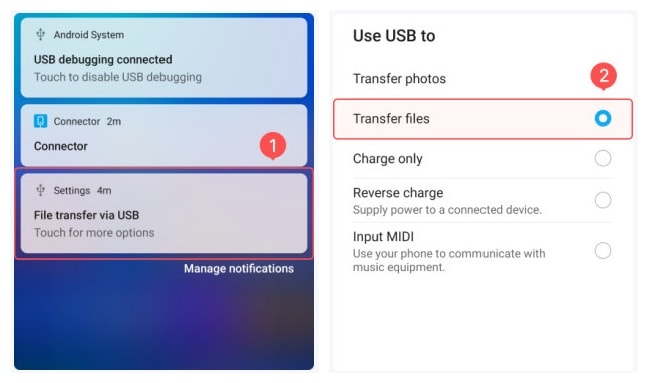
- Use an authentic USB cable to connect your Android device to your PC.
- From your Android Device, select the option of “Transfer Files” to continue.
Step 3: Enable the Feature of USB debugging:
- Enter the settings menu on your Itel A60s deviceand scroll down and tap on the option of “About”.
- To gain access to the “Developers Option”, tap on the option of “ Build Number” seven times.
- Now enter the Develops option and from here enable the feature of “USB Debugging.”
- A pop-up window will appear asking for permission to allow USB Debugging. Check the box of “Always allow from this computer” and tap on “OK” to continue.

Step 4: Mirror your Android Screen to PC:
- By following the step above correctly, your device will share the screen successfully on your laptop.
Step 5: Control your Android Device through PC:
- Once you cast your device screen to the PC, now you can control it too. For example, if you type in “best screen mirroring app for android” using the keyboard, it would also be shown on the Android screen.
Conclusion
The methods explained above will help you to mirror the android screen to Roku effortlessly. Each method has its cons and pros; however, if you do not own a tv and want to share your android screen on a larger screen with your friends. For this purpose, MirrorGo is the finest option as it permits users to cast an android screen to the laptop and allows users to control their android device through a keyboard and mouse attached to the computer.
Also read:
- [New] Comprehensive Examination EditRite Pro Suite – The Final Word, 2023 for 2024
- [New] Real-Time Music Sessions on Douyin
- 3 Methods to Mirror Motorola Moto G24 to Roku | Dr.fone
- 3 Methods to Mirror Realme GT Neo 5 SE to Roku | Dr.fone
- In 2024, 8 Best Apps for Screen Mirroring Vivo Y200 PC | Dr.fone
- In 2024, How to Cast Samsung Galaxy S23 to Computer for iPhone and Android? | Dr.fone
- In 2024, How to Fix Honor X50i Find My Friends No Location Found? | Dr.fone
- In 2024, Overview of the Best Honor 90 Screen Mirroring App | Dr.fone
- Mac's Comeback Heroes: Unveiling 8 Data Recovery Applications
- Mastering Fundamentals of Email Signatures: Insights From Email Marketing in 2010 with Massmail Tools
- Nexus Nightlife Virtual Theater Realm for 2024
- Overview of the Best Infinix Smart 8 Screen Mirroring App | Dr.fone
- Prior Upgrades? Key Points Revisited
- Step-by-Step Guide to Correcting Realtek RTL8811AU Driver Complications
- Title: In 2024, Best 3 Itel A60s Emulator for Mac to Run Your Wanted Android Apps | Dr.fone
- Author: Seraphina
- Created at : 2024-12-30 16:05:51
- Updated at : 2025-01-04 18:31:44
- Link: https://screen-mirror.techidaily.com/in-2024-best-3-itel-a60s-emulator-for-mac-to-run-your-wanted-android-apps-drfone-by-drfone-android/
- License: This work is licensed under CC BY-NC-SA 4.0.